
Smart Dog BackTalk User Guide
Contents
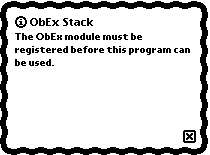
The BackTalk ObEx Stack requires registration in order to run. (None of the
other Smart Dog BackTalk modules currently available require registration.)
If the stack
module is not registered, or is registered with an incorrect registration code,
the following warning will appear whenever you try to send or receive using the
BackTalk ObEx Transport:
Registration can be done through Kagi's
web site, or through e-mail via the
Register application.
Be sure to send your Owner Info name, or your NewtonID name, as
the registration code will be generated from one of those names.
Once you receive your registration code, go into the Extras drawer, choose
Extensions from the tab at the top, and find the ObEx Stack icon:

Click on the icon; the following screen will appear:
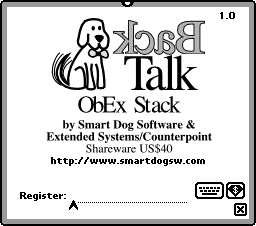
Enter the registration code in the field provided. When the code is correct, the field
will become non-editable (to avoid unintentional changes).
Inside an application, click on the action button, and choose Beam:
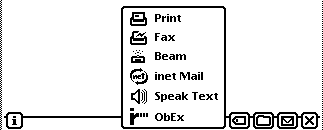
The beaming envelope appears.
(If the beaming envelope does not appear, and instead beaming starts
immediately, go to the Extras Drawer, choose the InOut Box,
and click on the Information button in the lower-left corner. Choose
Beam Preferences, click on When beaming, and select
Specify when.)
Click on the stamp in the upper-right corner, and
choose ObEx, to activate the BackTalk ObEx Transport:
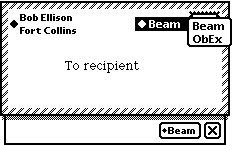
The beaming envelope will disappear, and will be replaced by the ObEx envelope:
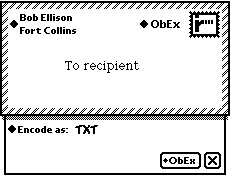
Underneath the envelope is an Encode as: field. Use this to choose
an encoding for the data you have selected. Available encodings will depend on
what InterChange translators are present in your
Newton, and can include some or all of:
- Newton frame, a Newton-specific format that only other Newtons
will understand
- TXT, an ASCII text format, used in particular for the Palm Memo Pad
application
- VCF, an encoding of a name card, used by the Palm Address Book
application
Choose the desired encoding from the selector. Then click on the ObEx button;
depending on your settings in the In/Out Box, the object will either be
sent immediately,
or will be submitted into the Out Box for later transmission.
The Out Box
If Later is chosen, the object is encoded and stored in the Out Box.
The Out Box will appear something like this:

The encoded item itself can be viewed by clicking on it. It will look something like this:
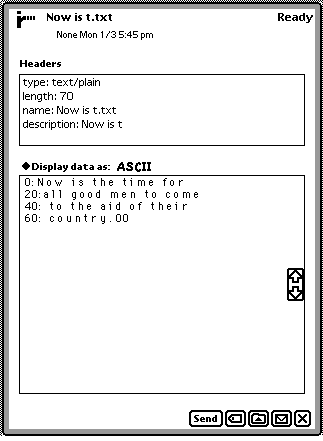
The Headers are standard IrDA IrOBEX headers that describe the object. The data, which
can be displayed as ASCII or in hexadecimal, is displayed below.
The view can be closed with the close box in the lower right-hand corner. Then click on
the Send button, and choose ObEx:

The BackTalk ObEx Transport will then open a connection.
If the Preferences for the BackTalk ObEx Transport
are set to send data immediately, or if a Send ObEx operation is started
from the Out Box, the following status dialog will be visible:

Move a receiving device (such as a Palm device, set in its Prefs application
to have Beam Receive: On) into range of the transmitter on the Newton.
The transfer should begin automatically, and finish automatically, with status dialog
boxes indicating the state of the transfer.
If something goes wrong, see Troubleshooting.
First, open the InOut application, and choose the In Box radio button.
Then click on the Receive button, and choose ObEx from the menu:
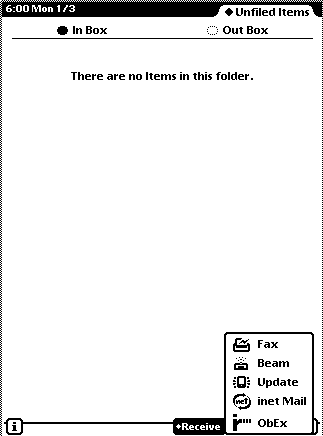
The BackTalk ObEx Transport server will begin to run; the following dialog will be displayed:

indicating that the server is waiting for a peer device to begin a connection.
Bring another device within range of the Newton's infrared receiver, and begin a beaming
operation. The Newton should receive the data automatically, and return to Listening
status, to allow more items to be received.
When all desired items are received, click the Stop button on the Listening
dialog box.
The received items, still in binary format, should be visible within the In Box:
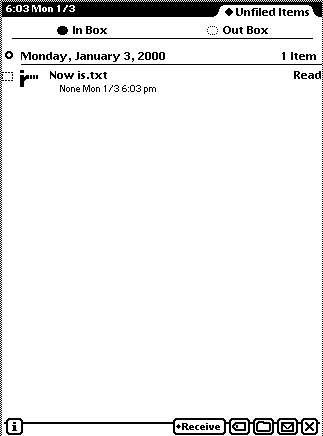
The received items can be displayed in their binary format by clicking on them.
Select the checkbox of the desired item or items, and then click on the tag button at the
bottom of the view. Alternatively, click on the item to view it, and then click on the tag
button at the bottom of the view:
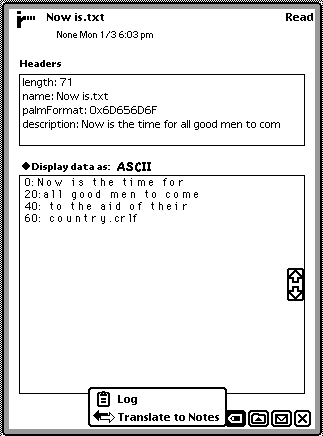
A set of available translations will appear. Choose the desired translation;
when the translation is complete, a new object will appear in the In Box:

This new object is of the chosen type. It can be examined in the In Box,
operated upon, and Put Away with the tag button normally.
Some aggregate items (in particular, VCF and TXT files representing Palm categories)
will translate to multiple objects. Each object will appear individually in the
In Box after translation.
Note that the original binary object will remain in the In Box until
you dispose of it yourself.
See also
[an error occurred while processing this directive]
This page was last modified on April 24, 2001.